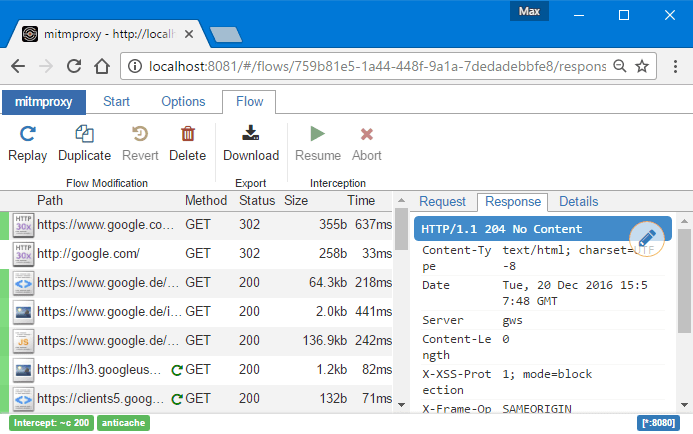
mitmproxy --mode=upstream:http://127.0.0.1:7890 -s ~/Projects/myscript.py
mitmproxy --mode=upstream:http://127.0.0.1:7890 --upstream-auth=username:pwd -s ~/Projects/myscript.py# 你有一个本机服务A端口8000,你想把访问80端口的B服务都转到A,可用反向代理解决
# 设想80端口的B服务,是公开对外服务,而隐身在B服务后的A服务,或A类服务群下的A1,A2,A3服务对都可以通过返向代理来灵活调配
# 注意事项1,响应文档中的绝对URL和重定向不会被ReverseProxy处理,解决方案是在/etc/hosts中把所有ListenHost都指向到ReverseHost
# 注意事项2,反向代理模式下mitmproxy会自动重写Host标头以匹配上游服务器,可用keep_host_header选项禁用此行为
# 例1.把80端口的访问转给tp6处理(tp6运行端口为8000)
mitmproxy --mode reverse:http://127.0.0.1:8000 --listen-host 127.0.0.1 --listen-port 80
# 例2.把80端口的访问转给flask处理(flask运行端口为5000)
mitmproxy --mode reverse:http://127.0.0.1:5000 --listen-host 127.0.0.1 --listen-port 80
# 例3.把80端口的访问转给nodejs处理(nodejs运行端口为3000)
mitmproxy --mode reverse:http://127.0.0.1:3000 --listen-host 127.0.0.1 --listen-port 80透明代理之透明网关,需在终端机网络设置网关为代理机IP地址,终端机应用则无需变动(如一些无法自配置代理访问的应用)
WireGuard (transparent proxy), 以WireGuard mode的透明代理为例,对手机移动端数据抓包
WireGuard模式, mitmproxy在内部运行WireGuardServer,你的移动端可以通过标准的WireGuardClienty应用进行连接.
- Start mitmweb --mode wireguard.
- Install a WireGuard client on target device.
- Import the WireGuard client configuration provided by mitmproxy.
# android4证书安装后的mitmproxy配置, Option connection_strategy=lazy, tls_version_client_min=TLS1
# ~/.mitmproxy/* 下存放所有的mitmproxy可用证书,安卓系统证书安装如下操作得到HASH值证书c8750f0d.0

# 1.生成HASH值证书c8750f0d.0
cd ~/.mitmproxy/
hashed_name=`openssl x509 -inform PEM -subject_hash_old -in mitmproxy-ca-cert.cer | head -1` && cp mitmproxy-ca-cert.cer $hashed_name.0

# 2.用adb推送证书到安卓系统目录/system/etc/security/cacerts/, Download/c8750f0d.0为你安卓系统存放上述1生成的HASH值证书(你可通过邮件等各种方式转存电脑文件到安卓手机上)
# Waydroid 安卓模拟器以root方式shell是: sudo waydroid shell
su
mount -o rw,remount /
cp /mnt/user/0/emulated/0/Download/c8750f0d.0 /system/etc/security/cacerts/
chmod 644 /system/etc/security/cacerts/c8750f0d.0
# 从http://mitm.it下载linux证书,如证书名为 mitmproxy-ca-cert-linux.pem
sudo mv mitmproxy-ca-cert-linux.pem /etc/pki/ca-trust/source/
sudo update-ca-trust

# playwright chromium 安装mitmproxy证书, chromium证书数据在 ~/.pki/nssdb,留意这个上上录chromiue要读写权
sudo dnf install nss-tools

# 查看已有证书
certutil -d ~/.pki/nssdb -L
# 安装mitmproxy的linux证书, -n参数为你安装后的证书名,-i参数为要安装的证书文件
certutil -d ~/.pki/nssdb -A -t "C,," -n fedroa38mitmproxy -i /etc/pki/ca-trust/source/mitmproxy-ca-cert-linux.pem
You can disable inbound header validation by setting the corresponding option: https://docs.mitmproxy.org/dev/concepts-options/#validate_inbound_headers We don't allow malformed HTTP by default because that technically enables HTTP smuggling attacks, but that's not much of a concern for almost all users. 尝试在关闭HTTP2支持后,此问题解决
# UI https://clash.razord.top
# local config.yaml
cd ~/Downloads/clash-linux-amd64-v1.16.0
./clash-linux-amd64 -d .# 去重
uniq MasterList.txt > UniqueMasterList.txt
# 先排序再去复
sort MasterList.txt | uniq > UniqueMasterList.txtexport no_proxy=localhost,127.0.0.0.1,::1
export http_proxy=http://127.0.0.1:7890/
export https_proxy=https://127.0.0.1:7890/
export all_proxy=socks://127.0.0.1:7891/export http_proxy=http://127.0.1.1:7890
export https_proxy=http://127.0.1.1:7890
export no_proxy='127.0.0.1:8191,localhost:8191,local,.local,.localdomain'